Saturday, August 7, 2021

How to properly paint oak grained kitchen cabinets

 How To: Painting Oak Grained Cabinets


Repainting your old oak-grained cabinets can help you save a great deal while creating a completely new space in the process. Everyone loves a new space, the feeling of walking into a neatly tucked and well-designed space is hard to match. However, everyone cannot afford to get the entire space redone. Just the cost of replacing your cabinets can cost you a small fortune.


Rather than spending time and money ripping out the old and getting in the new, it's time to pause and assess the situation. If the cabinets are in good condition, it's best to go for a re-painting rather than replacement. Think about it for a moment, why throw away perfectly good cabinets when you can save a great deal of money while ensuring you are making the most out of your space!


HOWEVER

It is very costly and time consuming to completely remove the grain from oak grained kitchen cabinets. I would not expect a painter to be able to promise this. Remember oak grained cabinets are typically stain grade, hence why the grain is showing, painting a stain grade cabinet can be done but you will see the grain.


There are a few products, grain fillers and such but this process can be very costly and still not remove all the grain. So below is with the expectation your aware you may and will still see the grain.


Your cabinets can still look amazing even with the grain showing.


How to Paint Oak Grained Cabinets

Painting over an oak-grained cabinet is not a small undertaking, but one that can be done perfectly when following the steps listed below. 


The Preparation

There is a great deal to get done before you start priming and painting your oak-grained cabinets. While the process might seem long, it is all worth it in the end. Here is how to get started:


Emptying - Start by Emptying the cabinets and drawers in storage containers. Make sure you set a different space for each one, as you will be required to put it all back. Setting up a system, in the beginning, can help you save time. 


Remove - The second step you need to do is to remove the drawers and cabinet doors. It's best to number the cabinets and doors to make sure they go back in place. Secondly, you must tape down all the hardware to keep them paint-free.


Tape & Cloth - Using painter's tape, tape down all the spaces next to the cabinets. Making sure nothing goes overboard during the painting process. Cover all floors and countertops using drop cloths. This will help eliminate a tough cleaning process. 


Cleaning - Using TSP liquid substitute cleaner wipe down all the cabinet boxes, drawers, and doors. It's best to follow the directions on the bottle and ensure you rinse using a clean water towel, and dry it off using a dry cloth. 


Sanding - Using a 180-220 grit sandpaper or sanding block make sure you cover every inch of your cabinet boxes, doors, and drawers. Moreover, if you have lamination make sure you don't chip off the sheet. Once done, wipe the dust Using a tack cloth. 


Finally, it's best to wear a respirator or dust mask and gloves during the entire process.


Priming Process

The process requires a good stain blocking oil primer to ensure the old stain does not show in the new finish. Keep in mind if your cabinets have laminated sides you will need a special primer to ensure the laminated surface is well covered. 


Layer - Start by laying the drawers and doors on top of an edge that can help you cover a good chunk without getting any marks on the piece. Moreover, keep in mind that the drawers and doors have to dry before you can handle them. 


Oil Based or Water Based Primers - Using a polyester or nylon brush or sprayer you can cover the back of the doors and drawers at first. Once they are dry, flip them over and cover the other side. A pro tip is to paint in the same direction of the wood grain. 


Sand - Read the direction on your primer can and follow the suggestions lightly sanding your cabinet boxes, drawers, and doors using 220 grit sandpaper. 


Caulk - Check all the pieces carefully and caulk any gaps in the boxes, or cabinet doors using paintable caulk. It will take about 20 to 30 minutes for the caulk to dry, please let it set before you move forward. We do not recommend caulking moving panels, they are designed like this for a reason however we do understand the cosmetic reason.


Painting Process

Finally, the step you have been waiting for - it is time to start painting your oak-grained cabinets. Start by picking out a color, and test a small patch on the back of a door or drawer. Allow it time to dry to ensure you know what the end product is going to look like. Once you are sure of the color and its impact, it's time to get started!


Hard to Reach - Place some paint on a small roller tray, using a small paintbrush to cover all the cabinet boxes, drawers, and door areas that will be hard to paint using a roller. While you may think you will be able to cover it all, but in reality, it's best to leave large open spaces for rollers and cover the edges and hard-to-reach areas using a smaller brush.


Roller - Using a roller or sprayer starts with the back of the doors and drawers. Once they are covered on both sides it's time to move onto the boxes. Once done, let the pieces dry before you start handing them or moving them around. Letting them sit in place ensures the paint comes with a perfect finish. 


Second & Third - After at least 2 to 3 hours it's time to apply the second coat. Repeat all the steps a third and last time for a final finish. After the third painting session let the drawers, doors, and boxes dry for at least a day. Not all jobs require or include three coats of paint


Re-Hang - Once the day has passed it's time to re-hand the doors, set up the drawers, pull the tape off, and get it all in place. Once everything is in place take one last look and make sure it looks smooth, and you are done!


Sunday, July 11, 2021

Who Does Epoxy Countertops Near You?

 Who does epoxy countertops near you?


We do !
We do !


Who does epoxy countertops near you? 
Ryan Amato Painting is now offering epoxy countertops
Save money on replacing with granite or quartz countertops and use epoxy

Epoxy is durable, heat and chemical resistant
They provide beautiful marbleized finishes in an almost limitless design choices.

Epoxy countertops will be almost half the cost vs replacing using quality materials, easily can be cleaned and are scratch resistant.

We serve the entire Lehigh Valley and New Jersey area offering epoxy countertops for residential and commercial clients.

Epoxy is designed to go right over your existing surfaces and offers a lifetime limited warranty against delamination.

If you would like a facelift on any surface give us a call and we can give you a free no hassle virtual proposal with a few pictures.

With projects starting at $1750 you cannot go wrong using durable, strong and beautiful epoxy.

You can even select a matte or gloss top coat


Most of our clients are choosing epoxy countertops for the variety you simply cannot get using other materials.

As well as saving just a huge amount of money by using epoxy rather than replacing, it is not a hard decision.
We can get you a price for this service so fast at 
https://amatopainting.youcanbook.me and select Ryan or Christina or call 484-821-7112

Thursday, July 8, 2021

Dealing with a paint shortage

 The Great Paint Shortage of 2021


There is a shortage of both paint and workers and the shortage of quality labor has hit small businesses in particular.

 From a freeze in Texas to a fire in China , add in a pandemic and a labor shortage of plant workers and drivers we are seeing a huge paint shortage which is effecting our painting industry in many ways.

The paint shortage was exacerbated by this year's major winter storm.

Paint supply chain Sherwin-Williams was already suffering as a result of the COVID pandemic. However, the February winter storm that hit Texas added further constraints to the supply chain. "In an already-challenged supply chain due to COVID-19, the February natural disaster in Texas further impacted the complex petrochemical network causing significant disruptions," 


Texas leads the nation in petroleum refining production, which is necessary in manufacturing paint, according to Business Insider. The winter storm reduced the state's capacity to refine petroleum, which created a ripple effect for a reduced ability to manufacture nearly all paints.

With an abundance of work and a shortage of paint, this has lead to increased lead times of projects, having to juggle what products are used on projects and frequently changing the types and brands of paints being used.

"If you asked me what paint we will use on your project today for a job a month from now I would have no idea" says Ryan Amato of Amato Painting in Easton, Pa

 Many people also understand how important painting can be for their peace of mind and for their homes. Join us as we explore what this means for your home-improvements company or business.

Small businesses are feeling the effects of a paint shortage 
and labor shortage .

People are not working, where we would typically have an abundance of summer help , we are just not seeing it and as we talk with contractors across the country they are all in the same boat.

Paint companies are expecting their lead times to increase from six weeks to more than three months. At a time when many custom home builders need paint in five weeks, this means that the small home improvement and construction companies that serve them will be unable to make up the delay in supplies. [Source: The Wall Street Journal Online]

Small businesses will be negatively affected as a result of increased costs and extended delivery delays for products they need for their businesses.

As more small businesses look to services from large painting companies or call in their own contractors to do interior painting, these companies will be forced to change their schedules and prices, pass on the costs to consumers, raise prices for new customers or all three.

Source: The Wall Street Journal Online]

According to Wayne Phillips of the National Small Business Association, "It could lead businesses that specialize in these kinds of products into a death spiral that could quickly remove them from the marketplace.

"We are planning ahead as best as we can, however we would never order materials months ahead for projects, it just isn't financially feasible or smart to have a stockpile of paint, especially with clients whose schedules change or changes in scopes of work" . Ryan Amato


Some of the most commonly used paints are out of stock, many primers are no where to be found.

The paint shortages are being felt keenly because demand for the product is increasing as the weather improves, experts say. It will likely get worse too, because with summer approaching we’re entering into “painting season”. The summer weather is ideal for painting outdoors, and lots of people have projects planned for the warmer months, so demand for paint is expected to increase.

“We likely will need to take further pricing actions if raw material costs remain at these elevated levels,” said Sherwin-Williams CEO John Morikis during a company earnings call in late April.

Our advice is when you find a painting contractor you connect with, don't wait long to contract with them. Sign up, get your project on the "schedule" so they can start planning and allocating materials especially if it is a large project

Saturday, May 29, 2021

Staining A Wooden Deck And How Long Will It Really Last?

 Proper Expectations when staining a wooden deck

Staining a wooden deck

What to expect when staining a wooden deck can resolve many issues before that first complaint calls comes in.

Every contractor wants to offer a lifelong job but that expectation for the contractor and the customer is not possible especially for surfaces such as decks where moisture, weather, ice and daily abuse take a toll on the surface.

We at Ryan Amato Painting like to be upfront with every customer and let them know like almost anything on your home a deck will require the utmost care and yearly maintenance.

If you use a solid acrylic stain you can rest assured most likely you will be re coating the floorboards and the rails every year.

Ryan Amato Owner

Decks in harsh Climates such as ours in the Northeast require constant on-going maintenance and will often have to be re-done on a yearly or bi-yearly basis depending on elevation, exposure, previous condition, prep and type of Coating applied.

Let’s examine the challenges facing all contractors when looking to Re-furbish or Re-coat a Deck.

The biggest challenge of all is trying to meet elevated expectations that homeowners often have as to final finish appearance and ongoing durability of their newly coated deck.

Very often, the larger task of painting the actual home itself will be overridden by scrutiny to an attached deck project.

1) What type of Coating is on the Deck now?

If you have a Semi-trans Oil Toner Base product on a Deck now where you have a basic wood tone type color, like redwood to cedar, stick with it.

When staining a wooden deck expectations are very important

If you have a Solid color or Semi-Solid Oil Stain on the Deck where the Color is more solid in nature but grain of the wood still is quite prevalent, stick with that as well.

Oil Products will more so fade and chalk and will just require less maintenance in regards to peeling.

They just naturally wear better in my opinion and keep wood “oiled”, preserving it better in this dry climate.

Ryan Amato

If you have a Solid Color Acrylic Stain on a Deck, you will need to re-coat the Deck with the same , as sanding this coating out of the grain of the Wood is effectively really difficult in order to convert it to the Semi-trans.

You could also have issues with proper penetration and compatibility of Coating as you attempt to apply the Oil over any measure of residual acrylic coating that may still exist.

If the existing Deck has a had a oil product on it previously & has turned black due to years of neglect and effectively sanding the horizontals and the pickets would be difficult to do consistently, the Acrylic Stain option may be viable to achieve a better cosmetic final product.

Once the oil has evaporated out of the wood thru the years you will not have a compatibility issue here in that regard.

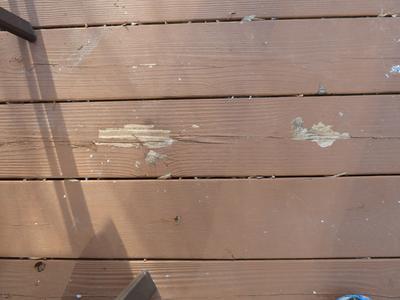
If acrylic paint has been applied to the deck it will need to be scraped and sanded off as paint is not designed for decks and lacks proper penetration and will most often peel off in sheets and be an ongoing nightmare to deal with.

NEVER apply Paint to a Deck especially to the bottom Support Structure. Paint is intended and designed to adhere to a primed and sealed surface.

It is NOT DESIGNED TO BE A PENETRATOR like an acrylic or oil stain! This is less critical with Hand Rails as they are principally vertical in nature but make sure primer is applied first under the Paint.

Regardless, top horizontal hand rail surfaces will peel and require regular maintenance whether paint is applied or acrylic stain. They cannot and will not withstand harsh weather conditions.

2) Pre-existing Condition of the Deck-

How old is the Deck? When was it last Coated? What Elevation does it face?

What are your expectations when staining your wooden deck

South and West Exposures are brutal on Deck Life. They are super hot & lend themselves to more fractured and cracked horizontal surfaces.

They allow more natural penetration of moisture which makes these cracks larger providing for constant expansion and contraction and ongoing peeling as moisture/vapor moves out of the wood into the atmosphere.

The older the deck, the more you will have to simply maintain it. Typically, areas of the deck, especially hi traffic areas, will need to be re-rolled or brushed every spring for sure.

Staining a wooden deck doesn’t have to be hard

This goes for either a Semi-trans oil product or a solid color acrylic product. Areas of Dry Rot where a Fungus has set in and is eroding the surface of the Wood or to some depth of the Wood need to be removed.

Not doing so would only make these areas worse and coatings do not adhere or penetrate into dry rot appropriately.

3) Shiners-

Let’s talk about what to expect when staining your wooden deck, especially a wood toner oil based semi-trans type product.

Wood, especially weathered wood, has different grains, existing cracking/fissures and absorption rates.

No particular area on a horizontal deck or a vertical hand rail corner to corner will absorb a coating exactly the same.

Staining a wooden deck doesn’t have to be hard

Amato Painting

This is just the nature of wood, period. In climates like Pennsylvania most often a 2 coat application of a Semi-trans. or a Solid Color Stain will be needed to properly protect the Deck.

The 1st Coat will seal the porosity and left alone will not typically be cosmetically pleasing to the eye and will not weather well.

Staining a wooden deck

The 2nd Coat will effectively seal the deck; provide better water resistance and longer life.

The second coat is typically back brushed or rolled out to areas that will pool up due to these different absorption rates of wood mentioned above.

The end result typically will be what can best be described as areas of variable look or sheen or better described as “Shiners.

This is just the consequences of sealing most any deck with most any coating.

Amato Painting

To expect a uniform look corner to corner is going to be unrealistic and unfair to your Contractor as is expecting these same horizontal surfaces not to have some sort of failure or maintenance even within the 1st year.

Intense moisture in the form of ice, snow, sleet, hail & rain along with 80-100 degree Sun, heat and UV is simply not going to allow a protective liquid to not have issues sooner than later.

However, these “Shiners” will settle down as the UV and sun starts the natural weathering process.

4) Sand or not to Sand?

For acrylic coated decks scraping and power washing loose coating is usually sufficient.

If the Deck has been painted inappropriately, then it will need to be sanded off as much as is possible followed behind with a quality penetrating acrylic stain

Once you have an acrylic stain product on your deck, you are pretty committed to it.

Again, really tough and expensive to convert to oil and you will experience varied results for sure.

What To Expect

In the end a deck takes a ton of abuse just from every day life, from walking on it, shoveling it in winter, dogs nails.

You cannot expect a coating to survive this type of abuse, wood is always contracting and expanding as well as the coating. Guess what will give first? Yes the coating, the stain

Have legitimate expectations you may be coating it every year , anyone who says otherwise is not being honest

Thursday, May 20, 2021

Epoxy Countertops Are Durable

 Epoxy countertops are very durable , long-lasting and stylish alternative to traditional granite, quartz, or laminate countertops.

At Ryan Amato Painting we are pleased to announce this new service using Leggari epoxy products

They’re made from two layers: the exterior layer is typically a durable high-gloss polyester that resists chipping and scratching, while the interior layer is epoxy resin that provides a solid surface for food prep and cleaning.

Epoxy countertops are stain-resistant. They are available in a variety of colors and patterns, and they have the added benefit of easily being able to match or complement your existing tile or stone.

The advantages of this type of countertop, though, go beyond good looks! Read on to learn about the advantages of epoxy over other choices in countertops.

Practical Advantages of Epoxy Countertops Epoxy countertops are almost indestructible. Epoxy resin is known for its durability, and epoxy countertops are a great choice for households that do a lot of cooking, cleaning, and scrubbing.

Heat won’t damage the surface or affect its color, and acidic materials like lemon juice won’t damage the countertop.

The surface is resistant to scratches, heat, chemicals, and abrasion as well. Epoxy countertops are a kitchen workhorse.

If you enjoy cooking and want something that will last a long time, epoxy countertops could be a great option for you because of their level of durability.

Epoxy Countertops Are Durable

Epoxy countertops can be customized. Homeowners who like to personalize their home décor can choose from a wide array of colors and patterns.

Epoxy countertops are durable, long lasting and easily maintained

They can also choose whether they want the top or bottom layer more textured or shiny.

Epoxy is a great alternative to traditional stone and other material counter­tops when you’re looking for durability, resistance to scratches and stains, and a natural look.

Epoxy countertops are worth it if you want something that will last. All of the cleaning, cooking, and food prep tasks on your kitchen table can be done with ease knowing that you have such a durable surface.

Thursday, April 22, 2021

One of a kind metallic epoxy floor


Metallic Epoxy Floor

Ryan Amato Painting completed a custom metallic epoxy floor for a client this week. After seeing our floor on our Instagram page Randy reached out to us and wanted a truly unique and one of a kind floor for their new living space.

After meeting with many other epoxy floor contractors and also considering doing the floor themselves they knew when speaking to us they wanted that deep 3d look only our floors can achieve.

There are a few reasons other contractors are not achieving this look but the most important one is their floors are being put down too thin, with epoxy the thickness and quality of materials is of the utmost importance for the look and longevity of your epoxy floor.

After preparing the floor, patching and holes and cracks, we primed the floor and then also applied a base coat of epoxy before adding any metallic epoxy.

Once we added the metallic colors (two ) we also added a unique application to infuse a third color giving the floor a deep, cloud like look.

They asked us to go crazy and do whatever we wanted to create a truly unique look and as you can see we delivered a floor they can show off for many, many years to come.

Tuesday, February 2, 2021

 Painting kitchen cabinets and expecting touch-ups down the road

When your kitchen cabinets are outdated or old, but you are not willing to replace them, you should paint and update the cabinet. Paint can increase the beauty of anything; kitchen cabinets are no different . 

You will find the kitchen more refreshing after the painting on the cabinets. It can be tough to paint cabinets as it requires a tremendous amount of skill to paint them, paint on the cabinets is the fastest way to provide a facelift to a kitchen.

C:\Users\Yasir ashfaq\Downloads\pexels-saviesa-home-2089698.jpg

However, it takes time but will indeed offer you satisfaction. Furthermore, cabinets in the kitchen get the everyday living's brunt. It is why a small amount of touch up paint on cabinets and rolling on a high end coating can increase the possibility of looking the cabinet new again.

This article will show you how to paint the kitchen cabinets and provide touch-ups to the cabinets.

Steps of painting kitchen cabinet

The kitchen is the heart of your home, but negligence in following any step may result in disaster for you. Take a long breath by following each step. The steps are here:

  • Wipe down empty cabinets with a degreaser and dry them.

  • Remove cabinet hardware and doors and make a map of the kitchen. Furthermore, label each part of the door by numbering each part.

  • Wipe your kitchen cabinet from the upper part to the lower leg.

  • Grab shop vac to remove any dust for finishing smoothly.

  • It would help if you went over your cabinets to make sure that all grit has been picked up.

  • Coat initially by primer will help the paint remain safe from chipping and peeling.

  • Paint the frame, shelves, drawers, and cabinets

  • Give 8 hours a coat to dry, then add another coat. 

  • After finishing the painting, allow the paint to dry completely. 

  • Reassemble the shelves, doors, and hardware after you match the locations.

Touch up cabinet paint

You could touch your kitchen's cabinet up if you had a small container or a can of paint when your cabinet was painted. If you sprayed them you may have some touch up issues

For wood cabinets, scratches, divots, and marks, a touch-up marker may blend into the rest of the paint. After doing all the work, you need to dry up the touch-ups.

You may use an alternative paint and can dab it to a partial area of the surface or your kitchen's cabinet. The process is being undertaken to hide nicks and serious gouges and alter the face of the decor of the kitchen altogether.

Conclusion

If you want to paint your kitchen cabinet, you need to follow its steps. Moreover, you can touch up the cabinets and downside easily and increase the kitchen's beauty. You would need to be creative, and you must understand the steps you need to take.

The cost of hiring an expert for painting kitchen cabinets is not inexpensive. That is the reason many people opt to paint cabinets by themselves by following the procedures. However the time and money saved by hiring a professional can outweigh the cost.